- Stone Center
- Blog
How to Lay the Flagstone Patio of Your Dreams
24/10/2024
10/3/2024
How to Lay the Flagstone Patio of Your Dreams
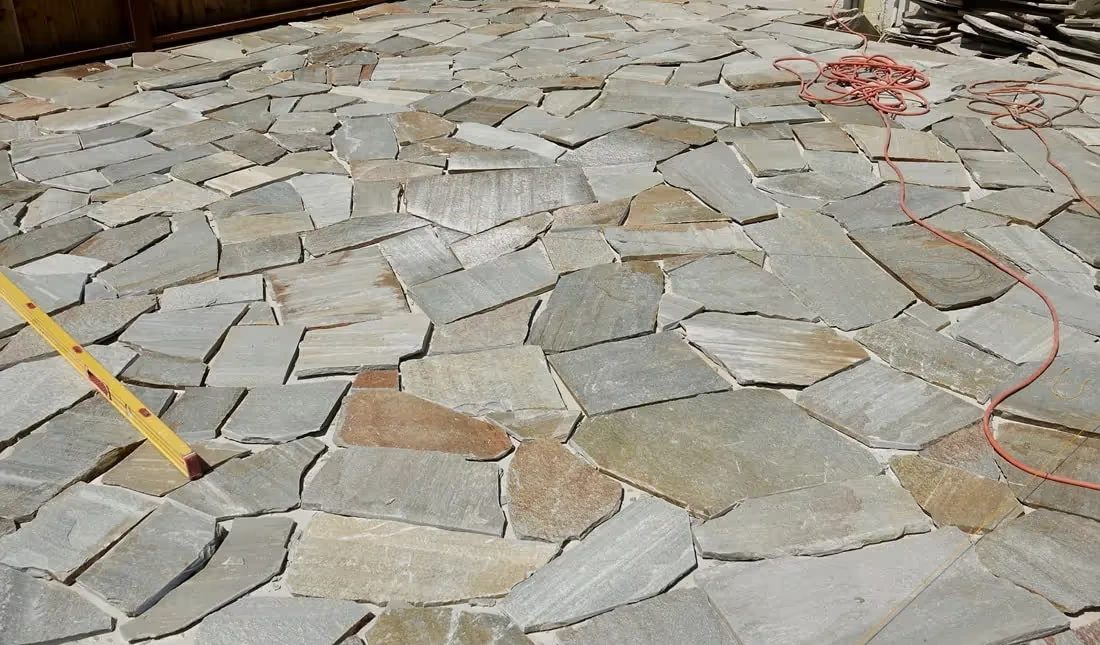
Dreaming of a backyard transformation but you’re not sure where to start? A new flagstone patio can add both beauty and function to your outdoor space. With its organic shapes and colors, along with the flagstone pathway, flagstone provides a unique aesthetic that’s hard to match.
If you're considering laying a flagstone patio on your own, this guide by our experts at Stone Center will offer invaluable guidance. From selecting the right materials to installation tips, our team will ensure you have everything you need to create the patio of your dreams.
What Are the Main Things I Need to Consider?
Creating a stunning flagstone patio starts with careful planning. Whether it's choosing the best stones or ensuring a level foundation, each decision can impact the final result. Here’s what you need to know before you start laying your patio.
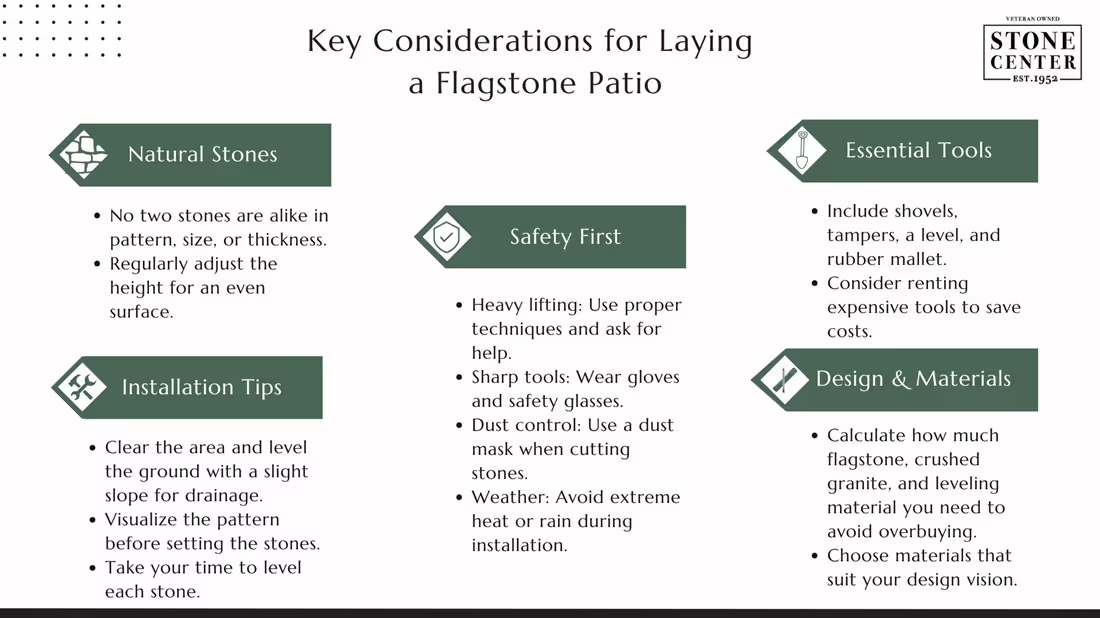
We gave you some general information as a helpful starting point. Now, let's dig into this information a bit deeper and discover how to lay a flagstone patio!
Select Your Flagstone Pavers
Choosing the right flagstone for your patio is like picking out the perfect piece of art for your home. It's a big decision that will impact the look, feel, and even the longevity of your outdoor space. To help you find the ideal flagstone for your style and needs, our experts have compiled a list of some of the most popular and versatile flagstone selections. Let's explore these stunning natural stones and see which one fits your dream patio perfectly!
*Average cost according to HomeGuide
For a small-sized flagstone patio (approximately 100 square feet), the cost would range between $1,750 and $3,000, including both materials and installation.
Stone Center also provides flagstone pavers that can be easily implemented in every outdoor living space. Ready to turn your dream into a reality? Now that you've chosen the perfect flagstone, let's talk about the tools and materials you'll need to make it happen.
Gather Your Tools and Materials
You have your design in mind, and you've selected your beautiful flagstone pavers. Now it's time to gather the tools and materials you'll need. Having the right tools can make a big difference in how smoothly your project goes, and you'll want to make sure you have everything on hand before you get started.
Some tools are essential, while others might be nice to have. If you're on a tight budget, remember that some tools can be rented to help you save money in the long run. Check out this table outlining essential tools and their average costs:
*Average cost according to Home Depot and Amazon
Remember, this table is only a guide. Your specific needs might vary depending on the size and complexity of your project, which might need an expert consultation.
Now that you have your tools and materials, let's tackle the flagstone patio installation process!
Installation Process
You've got your tools, your materials are ready, and now it's time to bring your dream flagstone patio to life! The installation process is a mix of planning, patience, and a little bit of muscle, but it's incredibly rewarding to see your vision come together.
Step 1: Plan & Design
Start by planning the layout of your patio. Sketch the shape and size of your desired space, and use stakes and string to outline the area. This will help ensure the patio is square (or shaped to your design) and fits your space perfectly.
Step 2: Clear the Area
Remove any grass, plants, rocks, or debris from the area where your patio will go. Once cleared, excavate the area to a depth of about 4-6 inches, or deeper if you live in a colder climate where frost heave is an issue. The bottom of the excavated area should be level.
Step 3: Lay the Base
Add a 3-4 inch layer of gravel (crushed stone) to the bottom of the excavation. This will serve as a stable and well-draining foundation for your flagstone. Compact the gravel using a plate compactor or hand tamper so that the layer is firm and level.
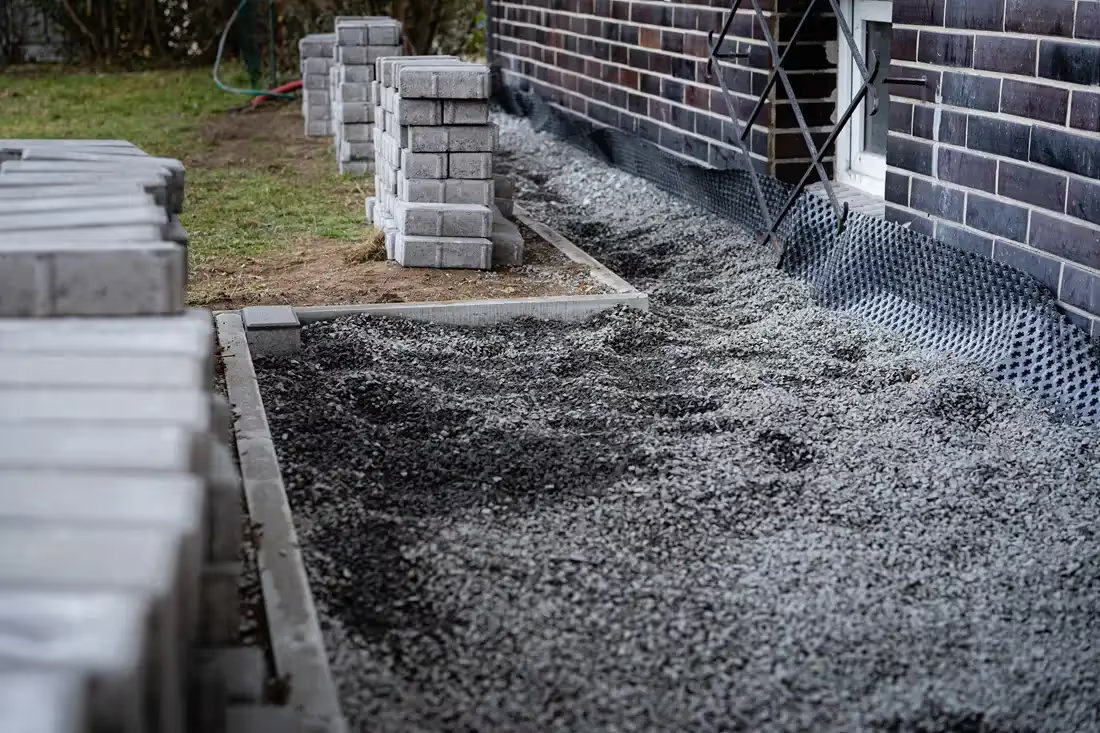
Step 4: Lay Landscape Fabric (Optional)
For added weed control, consider laying down landscape fabric over the compacted gravel. This step is optional but can help reduce future maintenance by preventing weeds from growing between your flagstones.
Step 5: Add Decomposed Granite or Sand
Spread a 1-2 inch layer of decomposed granite (DG) or sand over the compacted gravel. This layer will help with leveling the stones and filling any gaps. Use a screed board to ensure the DG or sand is evenly distributed and smooth.
Step 6: Place the Flagstones
Begin placing the flagstones, starting with the larger stones around the edges of the patio and working inward. Arrange the stones so they fit together naturally and leave 1-2 inches of space between them for joints. You can use an angle grinder to cut stones to fit as needed. If you’re having trouble or have no experience in cutting stone, be sure to check out our blog dedicated to stone cutting.
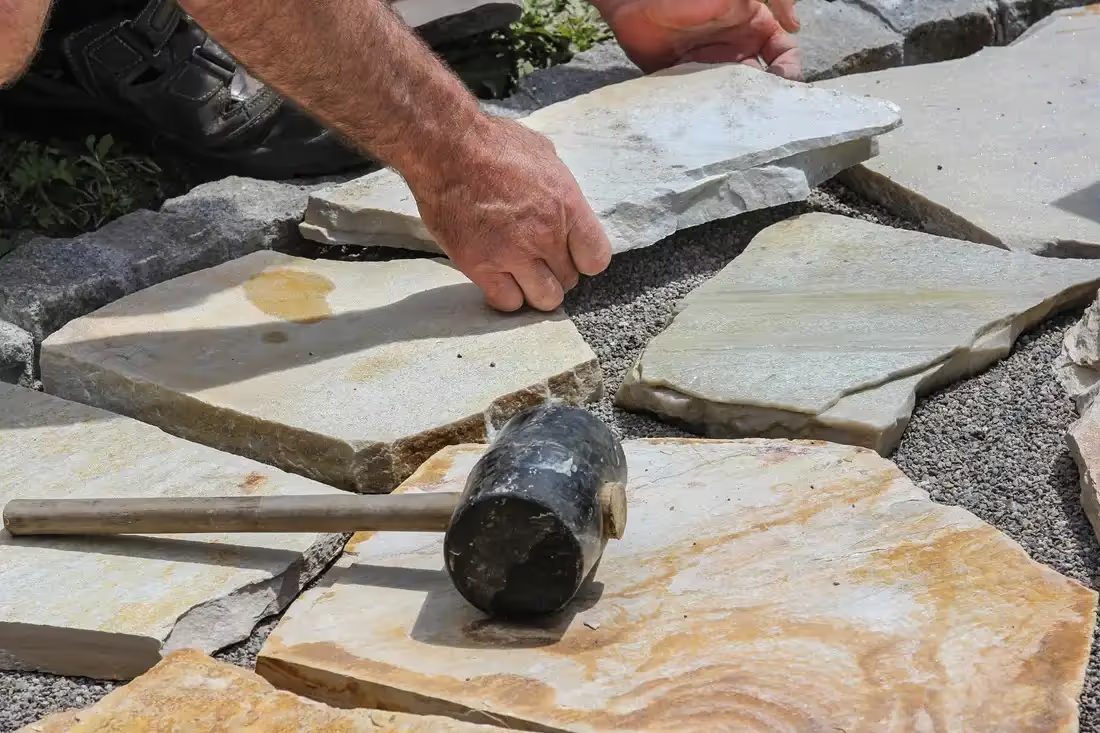
Step 7: Level the Stones
As you lay each stone, use a rubber mallet to tap it into place and a level to ensure it’s even with the surrounding stones. If a stone is too high or low, you can adjust the DG or sand underneath to create a uniform surface.
Step 8: Fill the Gaps
Once all the stones are in place, sweep decomposed granite or sand into the gaps between the stones. Use a broom to ensure the material fills the gaps completely, and lightly mist the patio with water to help the filler settle. You might need to repeat this process as needed until the gaps are fully filled.
Step 9: Compact Again
After filling the gaps, use the plate compactor or hand tamper to lightly compact the entire surface. This will help the stones settle in place and create a stable surface for your patio.
Step 10: Finishing Touches
For the finishing touches, you can add edging materials like bricks or metal around the perimeter of the patio to keep the stones in place. If desired, you can also apply a stone sealer to protect your flagstones from stains and weathering.
Step 11: Enjoy Your New Patio!
With the hard work behind you, take a moment to enjoy your new flagstone patio. Whether it’s for relaxing or entertaining, your beautiful outdoor space is now ready to enjoy for years to come.

Protect Your Investment: Aftercare Tips
A flagstone patio is an investment, not just in your outdoor space, but in your enjoyment for years to come. To ensure your patio lasts for decades, it's important to follow these simple yet extremely helpful aftercare tips:
- Sweep it regularly: Sweep away leaves, dirt, and debris to prevent buildup and staining. Use a broom or leaf blower to remove this buildup as needed.
- Fill gaps as needed: Over time, gaps between stones fill with dirt.
- Use masonry sand: Sweep it in, mist with water to settle, and sweep away the excess.
- Consider polymeric sand: It hardens and prevents weeds, but be sure to follow the instructions carefully.
- Seal (optional): Sealing protects your patio from stains and weather. It can also enhance the stone's color.
- Choose a penetrating or topical sealer.
- Apply evenly and follow instructions for drying time.
- Control weeds:
- Use landscape fabric: Lay it under the gravel base to prevent weeds.
- Hand-pull any weeds that appear.
- Repair cracks:
- Minor cracks: Fill with sand or DG.
- Major cracks: Consult a professional.
- Winter care:
- Remove snow: Sweep it off to prevent buildup and ice damage.
- De-ice safely: Avoid rock salt, use sand or de-icing products for stone.
Now that you better understand the basics of maintaining your flagstone patio, let’s dive into some expert advice from the Stone Center team.

Additional Tips from a Pro!
- Plan for proper drainage: Always design your patio with a slight slope (about 1/8 inch per foot) to allow water to drain away from your home. Without this, water can pool and damage the patio or your home’s foundation. Otherwise, it would lead to erosion or cause stones to shift over time.
- Choose the right stone thickness: For a backyard patio, flagstone should be at least 1.5 inches thick to prevent cracking under weight. As a general recommendation, thicker natural stone is better for high-traffic areas.
- Base preparation is crucial: A well-compacted gravel base (3-4 inches) ensures that your patio stays level and stable for years. Skimping on the base is a common mistake by homeowners who don't address the professional.
- Plan for heavy lifting: Flagstones are heavy, especially larger slabs. Make sure to have help on hand and use proper lifting techniques to avoid injury.
- Don’t overlook joint fillers: Use decomposed granite, sand, or gravel to fill gaps between stones. These materials will shift and compact over time, so refill them periodically.
- Know when to call a professional: If you encounter issues with drainage, leveling, or fitting stones, don’t hesitate to seek advice from a professional. Some aspects of the project may be more complicated than anticipated.
Ignoring even a single piece of advice we outlined above might lead to flagstone shifting. This may occur due to improper installation or poor base layer underneath. It won’t happen instantly and cause big problems in the future (especially for your pockets).
With these expert tips in your toolkit, you're now well-prepared to tackle any challenges that come your way. Whether you decide to work by yourself or call in a professional, your dream flagstone patio is within reach. Now, let’s wrap it up so you can enjoy the results of your hard work.
For additional tips, we recommend that you check out our blog on paver laying!
Conclusion
A flagstone patio brings both beauty and functionality to your backyard. It creates the perfect space for relaxation and entertainment. While the installation process can be challenging, the end result is well worth the effort. Plus, you’ll enjoy your future patio that much more knowing that you put the work in yourself to make it a reality. If you’ve followed this guide, you’re already well on your way to building a stunning outdoor feature.
Don’t hesitate to reach out for professional advice if needed—sometimes, expert help can make all the difference in achieving the perfect finish. At Stone Center, we’re always ready to help guide you in the right direction, from providing the right stone material to assisting with the installation process.
Contact us to start creating your perfect flagstone patio or flagstone walkway today!
FAQ
How much does it cost to make a flagstone patio?
The cost of building a flagstone patio can vary significantly depending on several key factors. For a standard 120-square-foot patio, you can expect to pay between $1,800 to $3,600, but the final price depends on multiple elements, such as:
- Type of flagstone: Prices vary between $5 to $13 per square foot based on the stone’s quality and availability.
- Installation: Labor costs can range from $10 to $25 per square foot, especially for intricate designs like herringbone or mosaic.
- Location & site prep: Costs may rise depending on excavation, leveling, and the need for a thick base layer.
- Base materials: Using decomposed granite or crushed gravel adds about $300 to $700 to the total.
Can I lay flagstone directly on soil?
We don’t recommend laying flagstone directly on the soil, as this can cause the stones to shift over time due to changes in the ground, leading to an uneven surface. A properly compacted base of crushed gravel and decomposed granite or sand guarantees stability and longevity for your patio.
Can I grow plants between my flagstone pavers?
Yes, you can plant ground covers like moss, creeping thyme, or sedum between the flagstones for a more natural look. Be sure to use proper spacing between the stones (1-2 inches) and fill the gaps with soil that supports the plants. Keep in mind that this may require additional maintenance to control weed growth.
Can a flagstone patio handle heavy furniture or foot traffic?
Yes, a properly installed flagstone patio can handle heavy furniture and high foot traffic. Just make sure to use larger stones (at least 1.5 inches thick), and the base is well-compacted to avoid shifting or cracking. Thicker stones (2 inches or more) are ideal for areas with heavy use. Using thinner and smaller stones can lead to cracks.
.avif)
Jon, the owner of Stone Center, is a knowledgeable expert in natural stone products, specializing in various types of stone for landscaping and architectural projects. Passionate about promoting the beauty and versatility of natural stone, Jon aims to use these blogs to inspire readers with creative ideas to upgrade their homes.
How much does it cost to get a stone restored?
How much you end up spending to restore stone varies on the type of stone, the technique, and the stone’s current condition. Stone in good condition will cost less to restore, whereas stone that has a lot of wear and tear may require a longer restoration.


