- Stone Center
- Blog
How to Cut Stones Like a Pro: Rock Cutting Techniques & Tools
23/7/2025
4/30/2025
How to Cut Stones Like a Pro: Rock Cutting Techniques & Tools

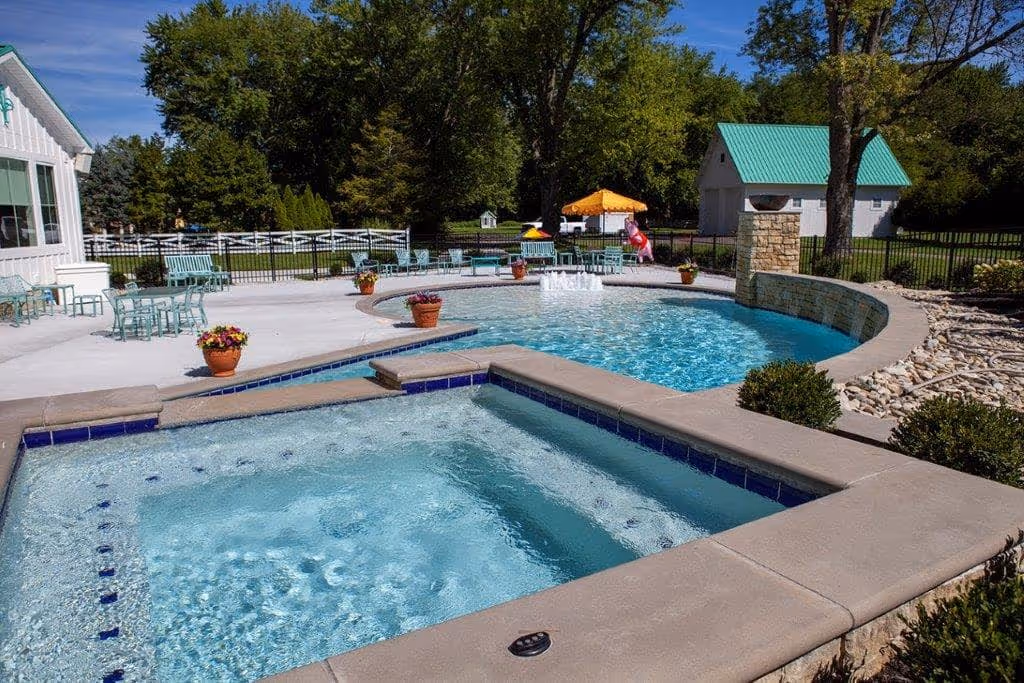
If you're planning an outdoor project in Ohio, cutting the rough stones to fit your design is an essential skill. Whether you're working on a walkway, patio, or retaining wall, knowing how to cut stone can make all the difference in achieving a polished and professional look.
In this guide, our stone-cutting team at Stone Center will walk you through various rock-cutting techniques, from basic hand tools to professional power equipment. You'll learn which tools work best for different situations, step-by-step cutting methods, and essential safety practices to protect yourself. By the end, you’ll be able to cut stones confidently and safely.
Choosing the Right Stone Cutting Method
Different tools for stone cutting methods work better for specific projects and skill levels. This simple rating system will help you quickly decide which method works best for your needs. Use this quick reference guide to determine the best approach:
How to Cut Stone with Different Cutting Tools
From basic hand tools that can be found in any hardware store to advanced power tools and everything in between, there are a variety of stone-cutting tools available for different purposes.
Cutting Stone with an Angle Grinder or a Circular Saw
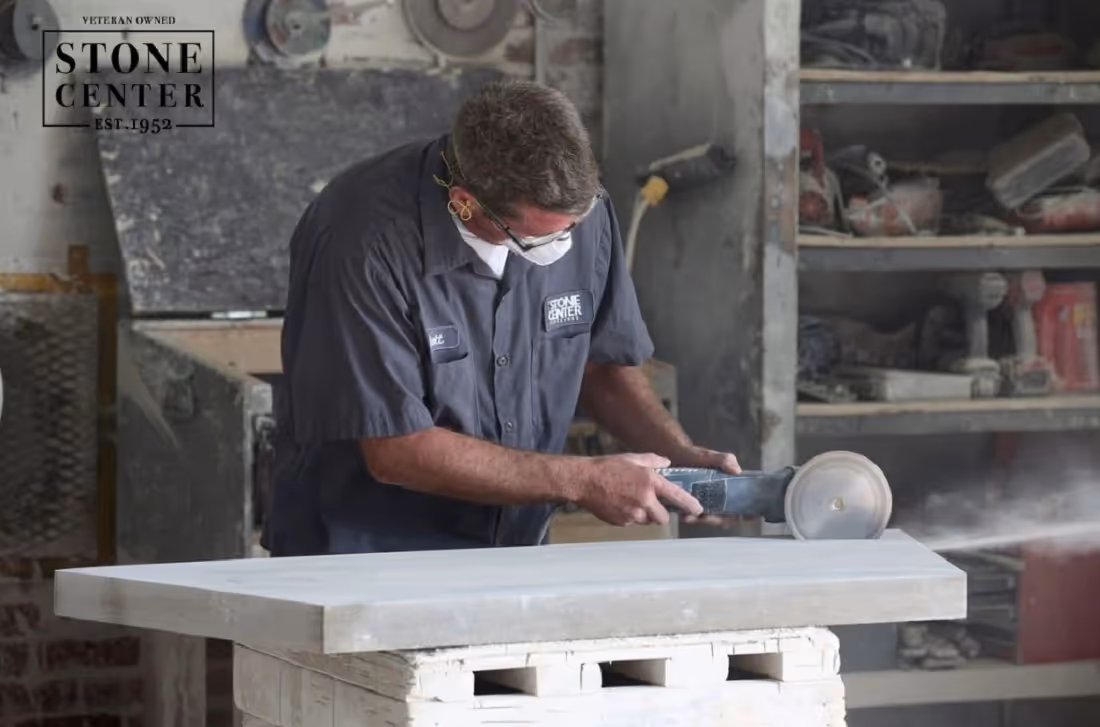
Best for: Straight cuts, medium to large stones.
These are powerful grinding tools that can be used to cut and shape a variety of stones. Here are some steps to follow when using an electric grinder to cut sandstone:
- Wear protective gear such as gloves and safety glasses.
- Attach a diamond-tipped masonry blade compatible with your tool (grinder or saw). Ensure it’s properly secured.
- Place the stone on a stable work surface (like sawhorses or a workbench) and clamp it tightly to prevent movement during cutting.
- Adjust the blade. For a circular saw, set the blade depth to cut about 1/4 to 1/2 inch deep. When using an angle grinder, control depth manually by making shallow passes.
- Turn on the grinding wheel and slowly lower the blade into the stone, using light pressure.
- Move the tool along a straight line to make your desired cuts.
- Once you've made all of your cuts, turn off the rock-cutting tool and let the blade come to a complete stop before removing the stone.
Remember that patience is the key when using an angle grinder or a circular saw. Let the diamond blade do the work rather than forcing it through the stone.
Tile Saw
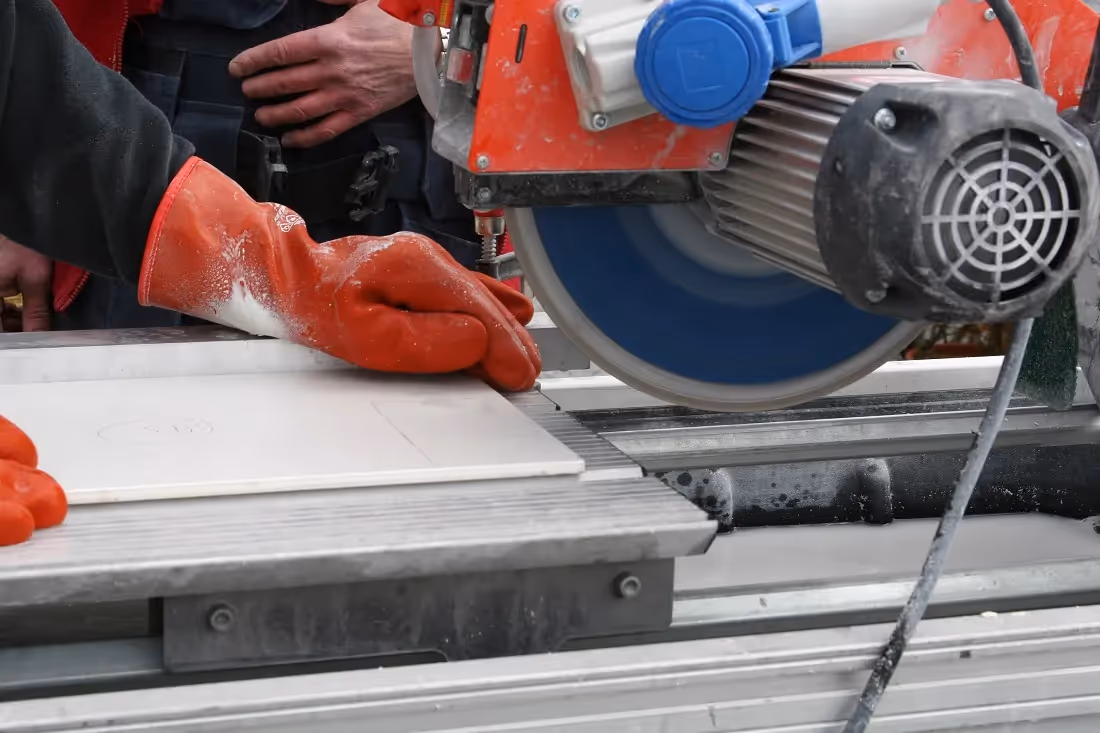
Best for: Precise, clean cuts on smaller stones, especially for visible edges.
A tile saw is a versatile stone-cutting tool that can be used for cutting a variety of stones, including paving stones. Here are some steps to follow when using a tile saw to cut rocks:
- Mark the stone where you want to make your cuts.
- Fill the saw's reservoir with water to lubricate the blade and reduce dust.
- Place the stone on the saw's table and adjust the saw's fence to guide your cuts.
- Turn on the saw blade and slowly lower it into the stone. Make sure to use light pressure and let the blade do the work.
- Move the stone along the fence to make your desired cuts.
- Once you've made all of your cuts, turn off the saw and let the blade come to a complete stop before removing the stone.
By following these steps, you can cut paver stones and other types of stones with a tile saw with ease and precision.
Masonry Saw

Best for: Professional results on multiple stones.
This professional-grade equipment offers the best combination of precision, speed, and safety. Modern dust collection systems allow for dry cutting while meeting OSHA silica standards. Here's how to use a masonry saw effectively:
- Ensure you're wearing all necessary safety equipment, including eye protection, hearing protection, and a dust mask.
- Ensure the diamond blade is appropriate for the stone type and securely attached. If using a wet cutting system, fill the water reservoir and check that the pump works properly.
- Mark your cutting line with chalk or a pencil. Secure the stone firmly against the saw’s backstop or fence.
- Power on the saw and allow the blade to reach full speed before beginning the cut.
- Push the stone steadily through the blade without forcing it. For thicker stones, make multiple passes, increasing the depth gradually.
- After cutting, turn off the saw and wait until the blade stops before removing the stone.
While professional masonry saws are a significant investment, they're invaluable for larger projects where accuracy and time savings justify the cost.
Rock Hammer & Chisel
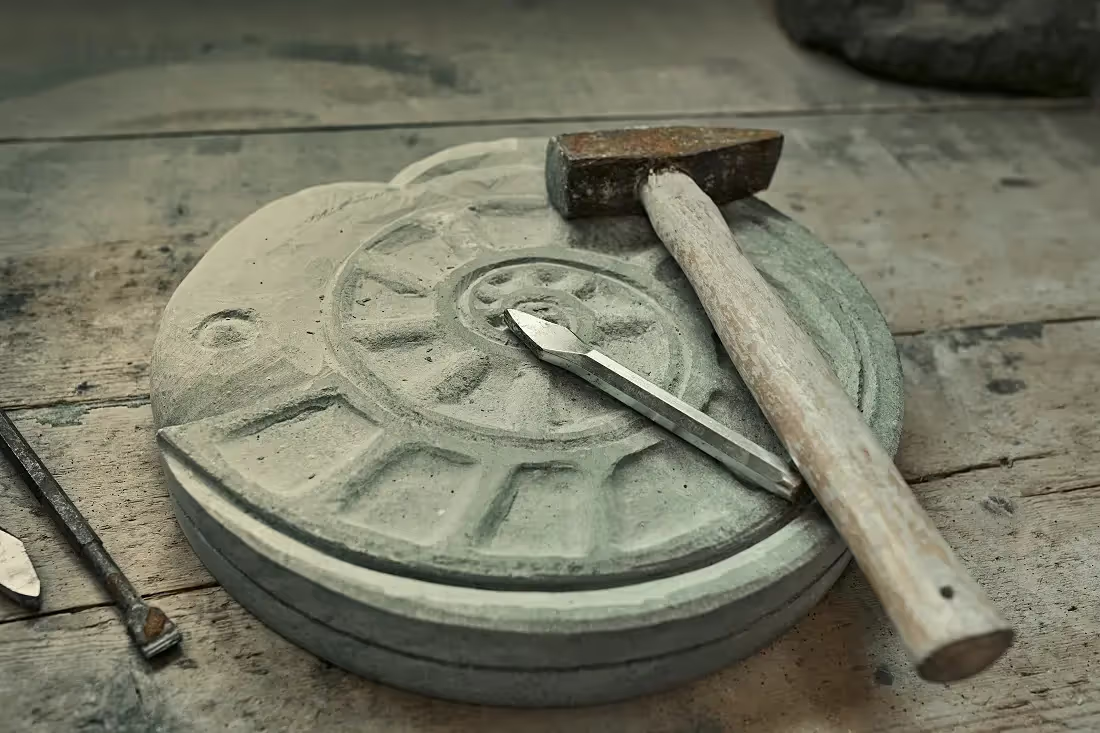
Best for: Natural breaks and rough shaping of small to medium stones.
The mason hammer is commonly used for cutting and shaping natural stone. Here are some steps to follow when cutting stones with a rock hammer:
- Choose the right rock hammer for the job. There are different types and sizes of rock hammers, and selecting the right one can make the cutting process easier and more efficient.
- Mark the stone to indicate where you want to make your cuts. This will help you achieve the desired shape and size.
- Use the rock hammer to make shallow cuts along the marked lines. Start with small taps and gradually increase the force until you make a deeper cut.
- Use the point chisel to break off the pieces of stone along the cut lines. Be careful not to hit too hard and damage the stone or injure yourself.
- Smooth out the edges of the stone with the rock hammer or a rasp file until you achieve the needed shape and finish.
When working with a rock hammer, the timing and accuracy of your strikes matter more than brute force. Listen for a change in sound as you strike — a higher pitch indicates the stone is about to split.
Mason Chipper or Hand Tracer
Best for: More precise splitting of small-to-medium stones.
If you're wondering how to cut rocks by hand, a mason chipper or tracer is a useful tool to have in your toolkit. Here are some steps to follow:
- Mark your cutting line precisely.
- Use a mason chipper or hand tracer for cutting stone to make a series of shallow cuts along the marked lines. This will create a groove that will guide your subsequent cuts.
- Gradually increase the force of your strikes with the mason chipper or tracer until you make a deeper cut.
- Use the chisel to break off the pieces of stone along the cut lines. You may need to repeat the process to remove larger sections of stone.
Traditional stone masons often develop a rhythm when working with tracers, creating consistent scoring lines before applying breaking force. For cleaner breaks, flip the stone and score the bottom side as well before applying the final breaking force.
Feather and Wedge System

Best for: Large stones and precise splitting.
The feather and wedge system is a traditional method for cutting stones and is still used today for precision cutting, especially if you are interested in how to cut stepping stones. Here are the steps to follow when using the feather and wedge system:
- Mark a straight line where you want the stone to split. Drill holes 4-8 inches apart along the line (depth should be about 1/3 of stone thickness).
- Insert feathers (curved shims) into each hole with the curved sides facing the direction you want to split.
- Tap each wedge gently with a hammer, starting with the center and moving outwards towards the ends. This will create a split in the stone along the marked line.
- Move the feathers and wedges further along the line and repeat the process until you've made all of your cuts.
We understand that it requires patience and practice, but this system can produce precise cuts with a clean finish.
Tile Nippers

Best for: Thin stones.
Tile nippers are useful for cutting small pieces of natural stone, such as mosaic tiles or small decorative stones.
- Hold the stone with one hand and the tile nippers with the other hand.
- Position the tile nippers over the marked line and apply pressure to make a small cut. Work from the edges inward for cleaner results.
- Continue making small cuts until you've achieved the desired size and shape.
- Clean up edges with light taps or by rubbing against another stone.
For natural stones like slate or thin limestone pieces, tile nippers offer remarkable control for creating detailed edges and curves that would be difficult to achieve using larger tools.
Safe Stone Shaping Tips
No matter whether you're planning to build a retaining wall or create a pathway in your garden, stone shaping is a process that requires skill and safety precautions.
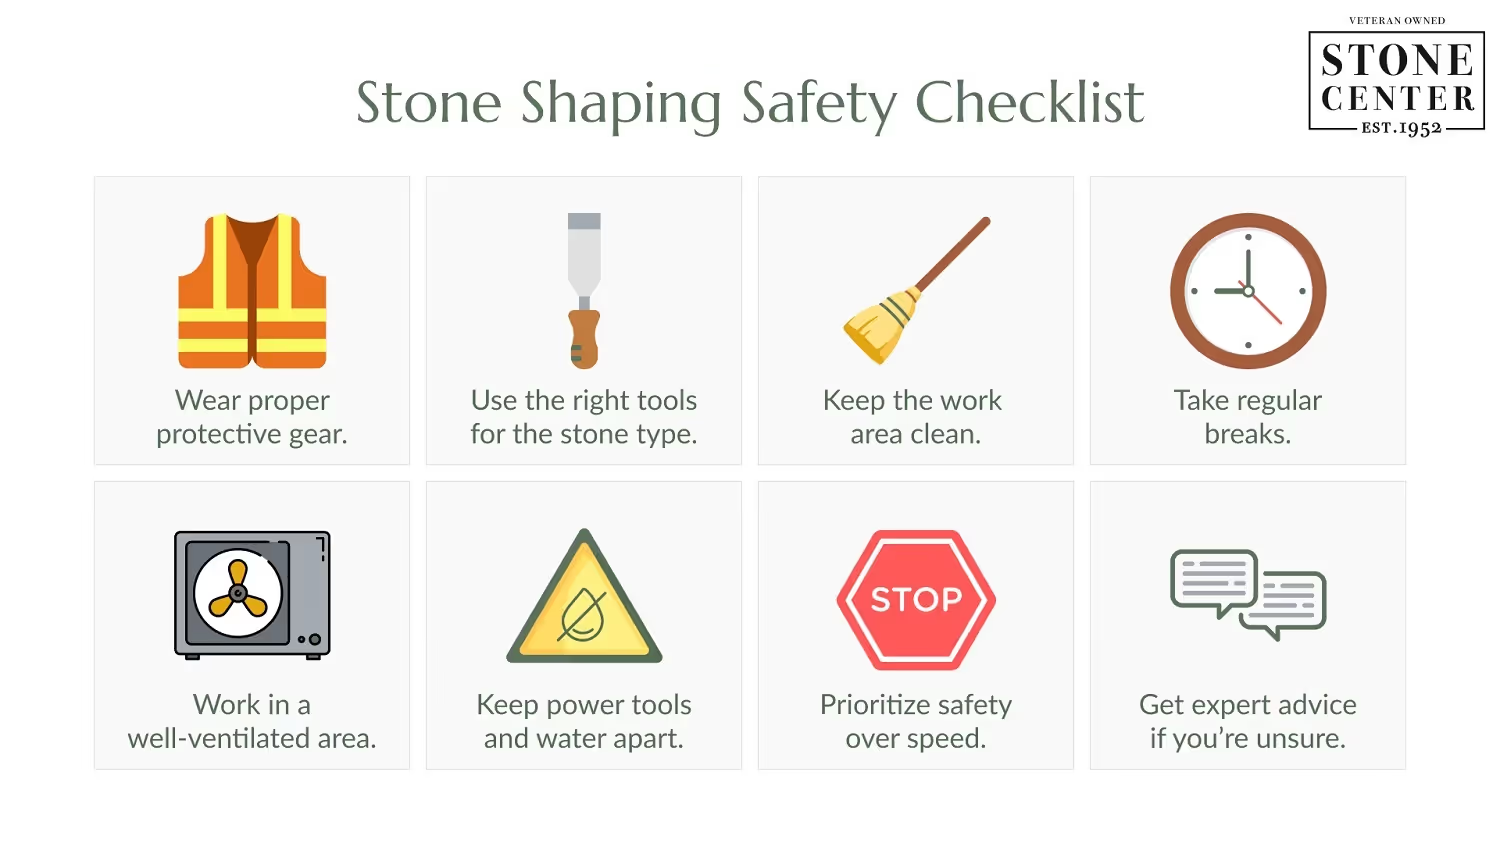
Here are some tips to help you shape stones safely:
- Wear protective gear, including safety goggles or a full-face shield, leather gloves, and a dust mask.
- Learn how to split stones safely. Different types of stone require different stone-cutting tools, so make sure to choose the right ones for the job.
- Keep your work area clean and free of debris. This will reduce the risk of accidents and injuries.
- Take breaks when needed. There's no denying that stone shaping can be physically demanding, so make sure to take breaks and stretch to prevent muscle strain or fatigue.
- Work in a well-ventilated area. Stone cutting generates a lot of dust, so make sure to work in a space with good air circulation.
- If you're unsure how to shape a particular type of stone, seek guidance from a professional or experienced stone worker.
Remember to always take your time and prioritize safety to avoid accidents or injuries.
Safety always comes first. When using electrical tools around water, it's important to prioritize safety to avoid potential hazards. Our team has outlined some helpful guidelines for working with power tools:
- Keep the tile saw at least 6 feet away from the electrical outlet to reduce the risk of water coming into contact with electricity.
- Avoid lining up the saw blade directly with the outlet to prevent water from being thrown into it.
- Keep a towel or shop rag on hand to quickly disconnect the saw if necessary to prevent electric shock.
- Use a drip loop whenever possible to prevent water from running into the electrical outlet and causing an electrical hazard. This is a crucial safety measure when using electrical tools around water.
Choosing the Right Natural Stone

Different stones require different cuts. Understanding your material will help you choose the right tools and techniques:
- Limestone: Soft and relatively easy to cut with basic tools; tends to break along natural seams.
- Sandstone: Moderately difficult to cut; abrasive to tools but cuts cleanly. The quartz particles in sandstone can quickly dull blades and bits, so we recommend diamond-tipped tools.
- Bluestone: Cuts cleanly with power tools. However, bluestone can also be split with hand methods.
- Granite: Hard and dense; requires diamond blade power tools for clean cuts.
- Slate: Splits naturally along layers; excellent for hand tools.
- Travertine: Relatively soft but can chip easily, so we recommend wet cutting for travertine.
Bringing Your Stone Cutting Project to Life
Even if you're a novice when it comes to gem cutting, as long as you're willing to put in the work and educate yourself, you can be successful in your project! Make sure that you obtain the stone cutters and techniques and you'll be able to create a beautiful and lasting outdoor space that you can enjoy for years to come.
Take your time, prioritize safety, and don't hesitate to contact the experts at Stone Center in Columbus and Cincinnati for professional stone-cutting services and high-quality natural stone products. As a leading Ohio stone fabricator and supplier, we’re always here to guide you in the right direction. Reach out to us today to see how we can assist you with your upcoming project.
FAQ
.avif)
Jon, the owner of Stone Center, is a knowledgeable expert in natural stone products, specializing in various types of stone for landscaping and architectural projects. Passionate about promoting the beauty and versatility of natural stone, Jon aims to use these blogs to inspire readers with creative ideas to upgrade their homes.


Check Out Our Products You May Like
.avif)
Buff Sandstone Rockface
$200 - $270 (each)
.avif)
Fond Du Lac
$400 - $500
.avif)
Jurassic
$400 - $700
.avif)
SC Gold
$190 - $260 (each)
How much does it cost to get a stone restored?
How much you end up spending to restore stone varies on the type of stone, the technique, and the stone’s current condition. Stone in good condition will cost less to restore, whereas stone that has a lot of wear and tear may require a longer restoration.